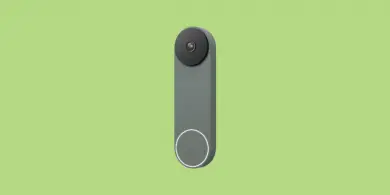
There are two things that seem to go hand-in-hand when you own a Nest doorbell: It will make your life easier, and you will need to reset it.
In this case, it’s rarely due to a quality issue. The Nest doorbell has hundreds of glowing reviews on Amazon and only a few mention encountering serious problems.
This has more to do with the fact that smart home devices as a category are still relatively new. Even huge companies like Google are still learning how to make them more reliable.
This is doubly true for smart doorbells, which have only been around for ten years (the original Ring doorbell came out in 2013). Doorbells also have the added challenge of having to function while being exposed to the elements year-round (not to mention the occasional poking).
So, if your doorbell is not capturing events properly, isn’t communicating with your Nest Mini or other Google devices, or you’re just looking to remove your data so that you can sell it, it’s important to know how to reset it the right way.
I will also share what you should do if resetting your doorbell doesn’t help (although I’m sure that won’t be the case for you).
Let’s get right to it!
How To Reset Nest Doorbell
You can reset your Nest doorbell by locating the reset pin on the back of the doorbell. Use a paperclip or reset tool to press the button down for 5 seconds for a soft reset or 12 seconds for a full factory reset. Keep in mind that a factory reset will delete all data and settings.
That’s basically the 10,000-foot view of the reset process. If you’re pressed for time, this should steer you in the right direction.
Keep in mind that there is a big difference between a soft reset and a factory reset of your Nest doorbell, though.
A soft reset basically sends a signal to the doorbell that tells it to restart itself. Just like when you turn your phone off and back on to fix it when something isn’t working, this can often help to resolve simpler issues such as a lost WiFi connection or trouble syncing with the app.
A factory reset, on the other hand, will wipe all data and settings on the doorbell and will permanently your camera’s video history. It basically returns the device back to the state it was in when you first opened the box.
(If you want to save a video clip or snapshot, do it before you reset. Google has a helpful article on how to download your recordings.)
A factory reset can help to resolve stickier problems like malfunctioning person detection and short recordings. In short, if the doorbell worked when you first got it, a factory reset should bring it back into working order.
It’s also considered good practice to factory reset a device before you sell it, give it away, or return it—especially if it has been recording people’s faces and activities.
You will need to set your Nest doorbell back up once you’re done with the factory reset if you plan to continue using it.
Here are the steps I’ll run through next:
- Locate The Reset Button On The Doorbell
- Reset The Doorbell
- Remove The Doorbell From Your Account
- Set Nest Doorbell Back Up (Optional)
Step 1: Locate The Reset Button On The Doorbell
Depending on which model of doorbell you have (wired or battery), the reset button is going to be in a different place.
- If you have a battery doorbell, take it off the wall or siding and flip it over. The reset pin will be towards the top of the back, directly below the USB port.
- If you have a wired doorbell, use a paperclip or reset tool to take the doorbell off of its base so that you can reach the back. Be sure to leave all of the wires securely connected. The reset pin will be at the top of the doorbell.
Step 2: Reset The Doorbell
For battery Nest doorbells, all you have to do is hold down the reset button for either 5 seconds for a soft reset or 12 seconds for a factory reset. The lights on the doorbell should turn off when it resets.
There are a few more steps involved for wired Nest doorbells.
You can perform a soft reset by pressing the reset button for 10 seconds. If you are using the Nest power adapter, simply unplug the adapter from the outlet and wait 10 seconds before plugging it back in.
In order to complete a factory reset, you will need to press two buttons:
- The Reset button located on the back, and
- The Doorbell button on the front.
Press both buttons down at the same time and then hold them down for about 10 seconds, or until all the lights on the doorbell turn off.
As you are doing this, you will want to be careful not to loosen any of the wires connected to your doorbell or it could interrupt the reset process. It can be a little difficult for one person to manage all of this, so if you have someone nearby, you might want to get their help for a few seconds.
If the soft reset solved your problem, then you don’t need to go any further. However, if you ended up performing a factory reset, then read on to complete the process.
Step 3: Remove The Doorbell From Your Account
After you’ve completed a factory reset, the final step is to remove the doorbell from your account.
You need to do this step even if you plan to continue using the doorbell, as you will now need to set it back up again.
Step 4 (Optional): Set Nest Doorbell Back Up
If you want to continue using your Nest doorbell, you will need to add it back to your account.
To set up your Nest doorbell after resetting it, follow these steps:
- Launch the Nest app
- Tap on the Settings icon in the top right.
- Tap on Add product.
- Scan the QR code on the back of your doorbell or enter the 6-digit code printed next to the code.
- Follow the instructions to complete setup.
Resetting Doesn’t Work, What Now?
If you’ve tried a soft reset and a factory reset and are still having issues with your Nest doorbell, it’s time to pause for a moment and check what else could be causing your issue.
- Has it been colder than normal? The Nest doorbell will only work if it’s warmer than -4ºF outside (-20ºC). And if you are using the battery model that’s wired in, the batteries can’t charge if it’s colder than 32ºF (0ºC).
- Is your WiFi signal strong enough? Make sure you’re connected to the 2.4GhZ WiFi band, if available. You can also download a signal strength testing app for your phone to check if the doorbell is getting a good signal.
With the cold weather that we’ve been experiencing lately, a lot of smart doorbell camera owners are starting to realize that these devices don’t function on extremely cold days. If you’re in the far northern latitudes, there may even be periods of weeks or months where it’s too cold for your Nest doorbell to operate.
If that sounds like you, it might be time to look into a more temperature-resistant doorbell like the SkyBell HD, which can operate in temperatures as low as -40ºF (-40ºC).


