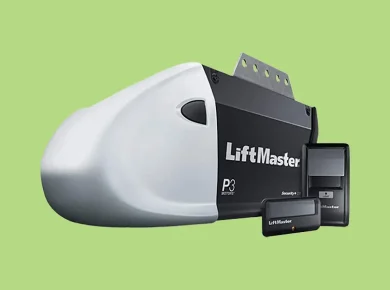
Mastering the art of garage door operation may not be on your bucket list, but if you’re a homeowner with a LiftMaster garage door opener, understanding the functionality of the Learn button is essential.
Whether you’re a first-time LiftMaster user or you’re looking to refresh your memory on the setup process, this comprehensive guide has you covered.
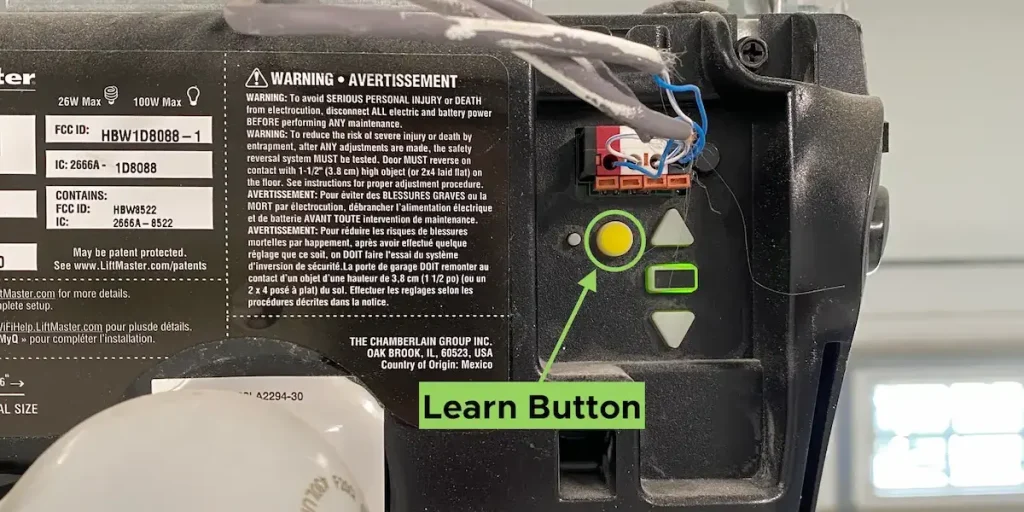
The LiftMaster Learn button is a round yellow button located on the side or back of the garage door opener. On models made before 2005, the Learn button may be green, orange, or purple. It can be used to erase all remotes and to program new remotes and keypad codes.
To start out, I’ll cover where to find the Learn button on your LiftMaster opener.
I will then guide you through erasing your LiftMaster Learn Button’s memory, programming it, and troubleshooting some common issues.
Locating the Learn Button on Your LiftMaster Garage Door Opener
Finding the Learn button on your LiftMaster garage door opener is a simple task. It’s typically located on the back or side of the motor unit, and you may need to remove the light bulb lens cover to access it. This button is crucial for programming remotes and keypads, so knowing its location is essential.
The Learn button on most LiftMaster openers is round and is typically yellow, although it may come in other colors. On older LiftMaster models, for example, the button may be green, orange, or even purple.
For newer models, it might be located behind the panel with the LiftMaster logo. Here’s a quick step-by-step guide to locate the Learn button:
- Remove the light bulb lens cover: If your LiftMaster opener has a light bulb lens cover, gently remove it to reveal the motor unit. However, not all models require this step.
- Locate the Learn button: Look for a round button on the back or side of the motor unit. Remember, the color may vary depending on your model.
Now that you’ve found the Learn button, you’re ready for the next step: understanding what this button does and why it’s crucial for your garage door opener’s operation.l
How to Program Your LiftMaster Learn Button: Step-by-Step Guide
Once you’ve located the Learn button on your LiftMaster garage door opener and understand its function, the next step is to learn how to program it.
The programming process is straightforward, and I’m here to guide you every step of the way.
Here is a step-by-step guide to help you program your LiftMaster Learn button:
Step 1: Press and Release the Learn Button
Find the Learn button on the back or sides of your garage door opener’s motor unit. It is usually a colored button (red, orange, green, purple, or yellow depending on your model). Press and release it. The indicator light will illuminate for 30 seconds, indicating that it’s ready to learn a new remote control code.
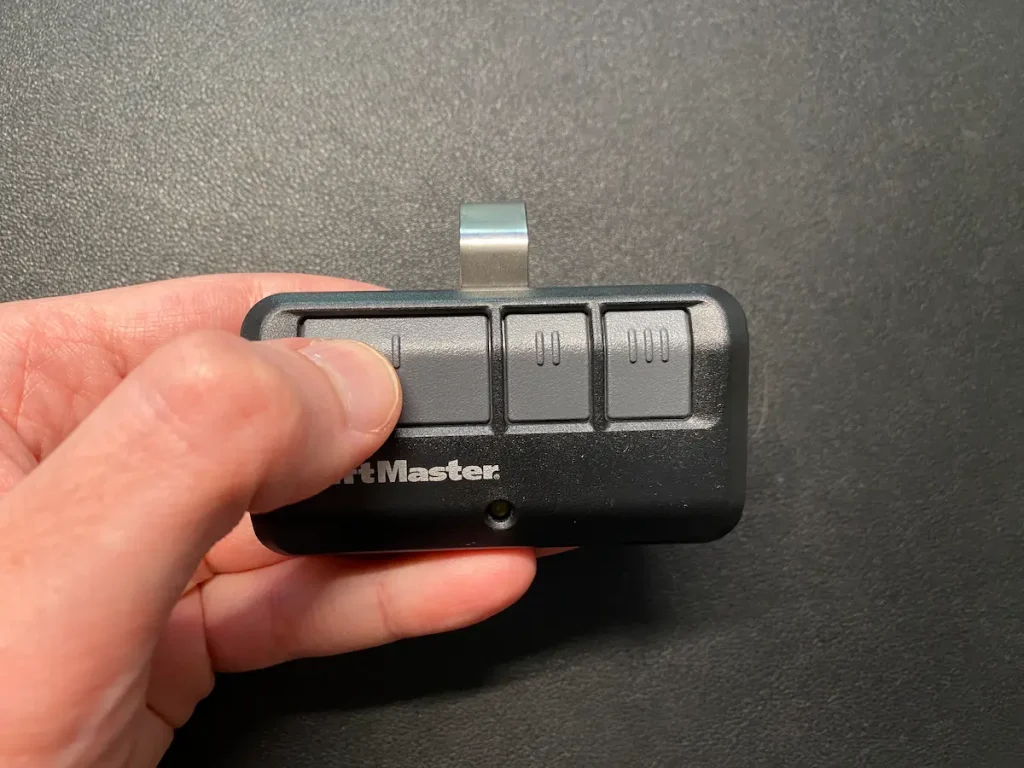
Step 2: Press the Button on Your Remote Control
Within that 30-second window while the indicator light is on, press and hold the button on your LiftMaster remote control that you wish to program. Release the button when the garage door opener’s lights blink, or you hear two clicks. This confirms that the code has been learned.
Step 3: Test Your Remote Control
Press the programmed button on your remote control. If your garage door responds by opening or closing, congratulations! You’ve successfully programmed your LiftMaster Learn button. If it doesn’t respond, repeat the steps outlined above.
Remember, if you are programming a universal remote control or a keyless entry, the process may differ slightly. However, the fundamental steps remain the same – press and release the Learn button, input the new code, and test it.
As a final note, it’s important to remember that safety should always come first. Never attempt to program your garage door opener while standing on a ladder or in a precarious position.
According to the US Consumer Product Safety Commission, it’s estimated that 20,000 people are treated in hospital emergency rooms each year in the United States because of injuries related to garage doors.
This statistic underscores the importance of exercising caution and safety when dealing with your LiftMaster garage door opener. Always ensure you’re on stable ground and that the garage door area is clear of people and objects.
How to program a garage door remote from another remote
There may be instances where you need to program a new garage door remote using an existing remote. This situation can occur if you’ve purchased a new remote, misplaced the original, or if the original remote is no longer functioning properly. The good news is that you can program a new remote from an existing one. Here’s how you can do it.
Step 1: Ensure Both Remotes Are Compatible
First and foremost, it’s essential to make sure that the new and existing remotes are compatible with your LiftMaster garage door opener. You can usually find this information in the user manuals or by contacting the manufacturer.
If the remotes are not compatible, they won’t be able to communicate with the garage door opener, and the programming process will be unsuccessful.
Step 2: Prepare the New Remote
Once you’ve confirmed the remotes are compatible, prepare the new remote for programming. This process usually involves pressing a specific combination of buttons on the remote. Refer to the user manual of the new remote for precise instructions.
Step 3: Copy the Code
With your original remote, press and hold the button that activates your garage door. At the same time, press and hold the same button on your new remote. Keep both buttons pressed until you see the light on the new remote flash or change its state, indicating that it has successfully copied the code from the original remote.
Step 4: Test the New Remote
After the new remote has copied the code, it’s time to test it. Press the button on the new remote to open or close the garage door. If the garage door responds accordingly, the programming has been successful. If not, you may need to repeat the process or check for any issues.
Remember, safety should always come first. Never attempt to program your remote if your garage door is not in full view, and always keep clear of the moving parts of the garage door during testing.
How to Erase Remotes Using The LiftMaster Learn Button
There are moments when you might find it necessary to wipe the memory of your LiftMaster Learn button. Perhaps you’ve misplaced a remote and want to ensure no one else can gain access to your garage. Or maybe, due to a few programming hiccups, a fresh start is exactly what you need.
Either way, resetting your Learn button can provide the solution you’re looking for.
Here are the exact steps you’ll need to take to erase your existing codes. Before you begin, keep in mind that this process will erase all codes and remotes, so you will need to re-pair any remotes that you’re using when you’re done.
Steps to Erase Remotes Using The LiftMaster Learn Button
- Locate your garage door opener’s Learn button. This is the round yellow button on the back or side of the motor unit.
- Press and hold the Learn button. Do this for about 6 seconds until the LED indicator light next to it goes off. This indicates that the memory has been cleared.
- Release the button. At this point, all codes previously programmed into the garage door opener have been erased. You can now program new remotes or keypads as needed.
Remember, erasing your LiftMaster Learn button memory will clear all programmed remotes and keypads.
So once you’ve erased the memory, you will need to reprogram any remotes or keypads that you still want to use with the garage door opener.
Make sure you have these devices ready so you can reprogram them immediately after erasing the memory to avoid any inconvenience.
Note: If you are unable to erase the memory successfully, it might be due to a malfunctioning Learn button or a more complex issue with your garage door opener. In such cases, it would be wise to consult a professional technician or LiftMaster’s customer service for further assistance.
How to Troubleshoot Common Issues with LiftMaster Learn Button Programming
On occasions where things don’t go exactly as planned, don’t fret. Here are some common issues you might encounter with the LiftMaster Learn Button programming, along with some tips on how to troubleshoot them.
Issue 1: Remote Control Not Working After Programming
If you’ve followed the programming steps and your remote control isn’t working, the issue might be with your remote’s battery. Check whether the battery is properly inserted or if it needs replacement. Another possibility could be that the remote control is faulty, in which case, you might need to replace it entirely.
Issue 2: Garage Door Opener Not Responding to Remote
Is your garage door opener not responding even after successful programming? It might be due to interference from certain electronic devices in your house, like LED light bulbs or even your neighbor’s garage door opener. Try turning off these devices one by one to identify the source of interference. If the problem persists, consider seeking professional assistance.
Issue 3: Multiple Remotes Not Programming
If you’re trying to program multiple remotes and facing difficulties, remember that a LiftMaster garage door opener can only remember five remote controls or keyless entries. If you’ve exceeded that limit, you might need to erase all the codes and start afresh.
Issue 4: Learn Button Not Lighting Up
If the Learn Button on your garage door opener isn’t lighting up when pressed, it’s likely because of a power issue. Check to make sure the opener is properly plugged into the power outlet and the circuit breaker has not tripped. If the power supply seems fine and the problem persists, it’s best to consult with a professional.
Unfortunately, troubleshooting doesn’t always entail a quick fix. Sometimes it involves a process of elimination to identify the root of the problem.
So be patient and methodical. If troubleshooting doesn’t resolve the issue, don’t hesitate to contact the LiftMaster customer support or a professional technician for assistance.
Conclusion: Take Control of Your Garage with LiftMaster Learn Button
Let’s be honest: Unless you’re the neighborhood tech guru, you probably aren’t programming your garage door all that often.
The main times you’ll want to use the Learn button are:
- When you’ve lost a remote and need to erase it for home security
- To reset your keypad code every 6-12 months
- If you’ve recently acquired a new remote or car that you want to program
- If a remote has stopped communicating properly with your opener
Hopefully this article was helpful in finding and programming all your devices using the Learn button. Be sure to bookmark this so that you can come back to it next time you need to update your garage remotes and codes!