If you’re selling your house or having trouble with your LiftMaster garage door remote, it can be helpful to reset it. Resetting the remote will erase all codes from the memory and allow you to program new codes.
Keep in mind that you may need a ladder to reach your garage door opener if you don’t have a wall mounted door control.
To reset your LiftMaster 893lm remote, first locate the “Learn” button located on the door control or on the back of the garage door opener. Press the “Learn” button once if using the opener itself and twice if using the door control. Then, press and hold the button you’d like to pair until the lights blink or you hear two clicks.
It’s a pretty straightforward process, but you may want to know how to reconnect your remote again after you’ve reset all the codes.
In the rest of this article, I’ll walk through the specific steps to reset and pair your LiftMaster 893lm remote after erasing all codes.
Let’s get right to it!
Reset Remote 893lm From The Door Control
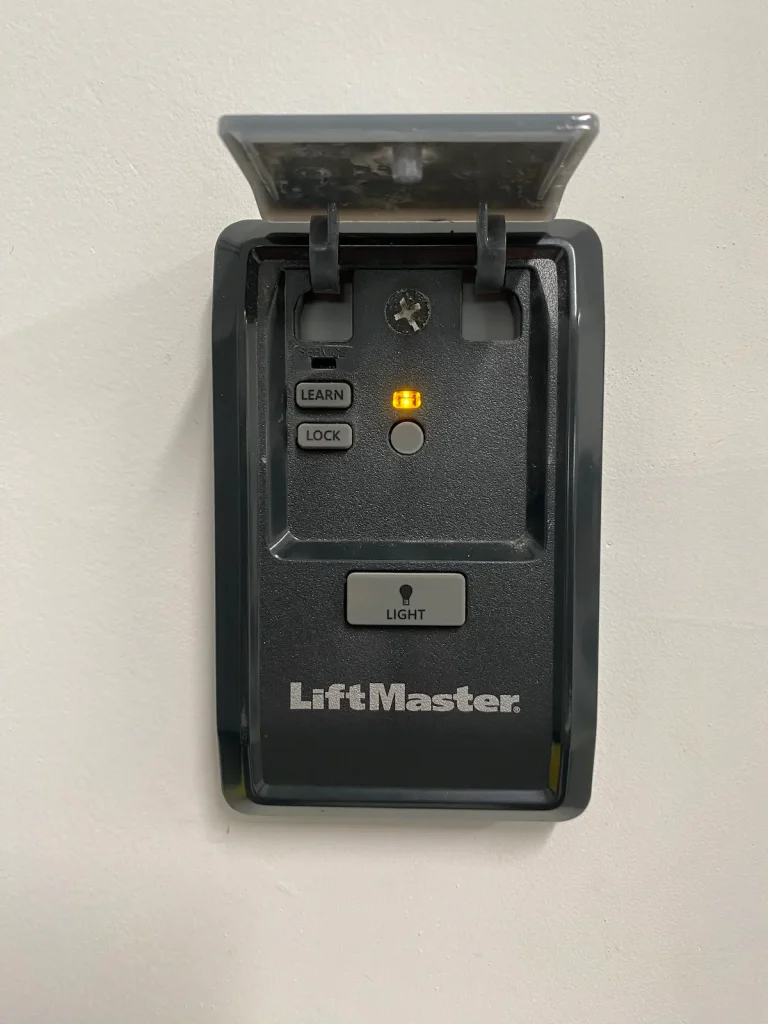
You can avoid having to use a ladder by resetting your 893lm remote using the door control. Open the cover and press the learn button for about 6 seconds or until the LED light turns off. This will erase all previous codes and your remote can be reprogrammed.
If you want to reprogram your remote to pair it back with the same garage door opener, follow these steps:
- Press the Learn button once—don’t hold it down.
- Press the Learn button again.
- On your remote, select the button that you want to control the garage door opener.
- Press and hold that button down until you see the garage door opener lights blink or you hear two clicks.
- Press the button one more time to test it and make sure it’s paired.
Reset Remote 893lm From The Garage Door Opener
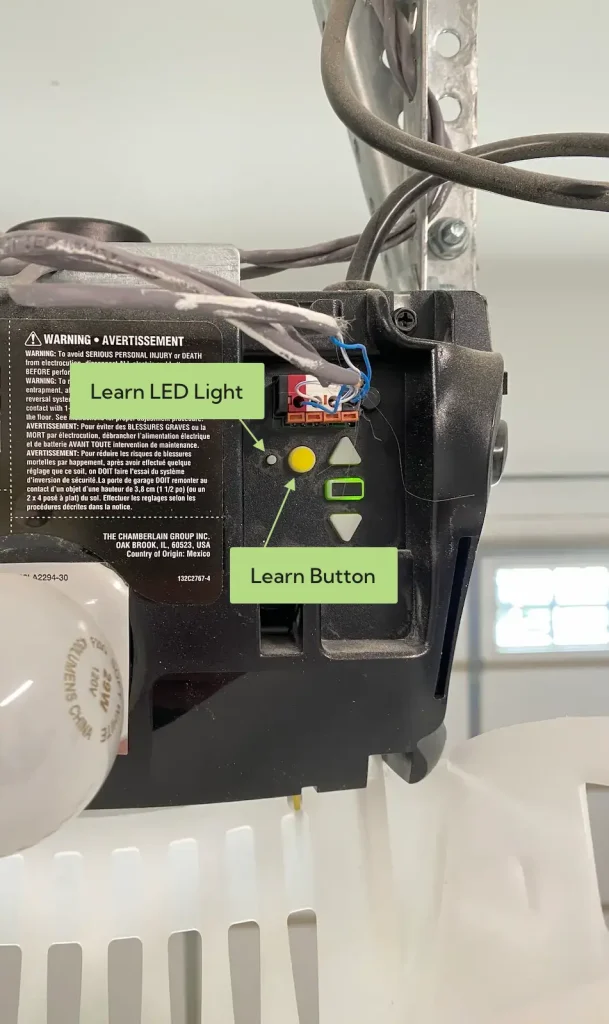
If you don’t have a door control with a Learn button on it, you can always reset your LiftMaster remote from the garage door opener itself.
First, use a ladder to access the LiftMaster garage door opener and open the cover on the back. Locate the Learn button, which should be a big round yellow button next to the up arrow. Press and hold it for about 6 seconds or until the LED light to the left of the Learn button turns off.
If you want to reprogram your remote to pair it back with the same garage door opener, follow these steps:
- Press the Learn button once—don’t hold it down. The LED will turn on and you will have 30 seconds to program the remote.
- On your remote, select the button that you want to control the garage door opener.
- Press and hold that button down until you see the garage door opener lights blink or you hear two clicks.
- Press the button one more time to test it and make sure it’s paired. Make sure that you and the ladder are out of the way before testing the door.
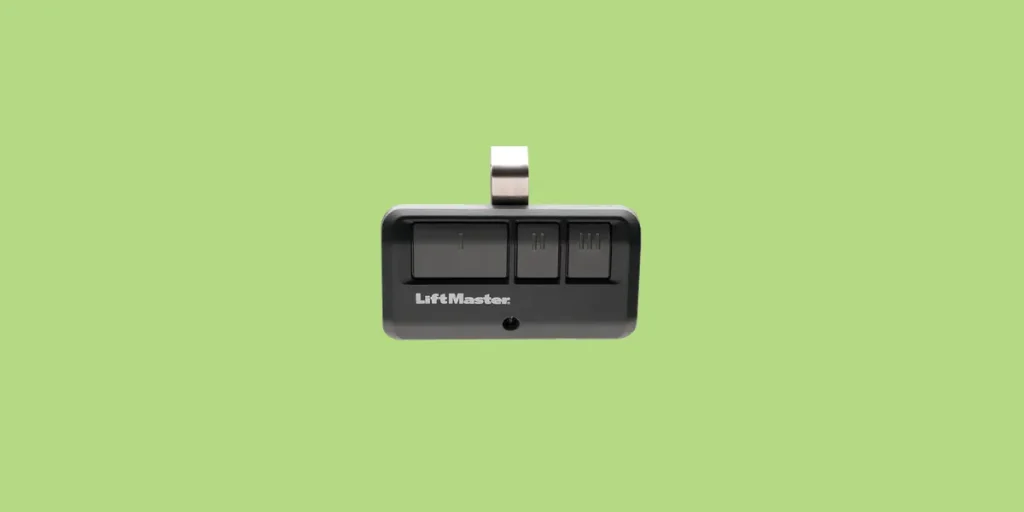
Which Button To Pair On The LiftMaster 893lm Remote?
The 893lm model of the LiftMaster remote has three buttons, so unlike the one button version, you get to choose which one will operate the garage door opener. You can select any of the three buttons when pairing your remote, but each button can only be paired to one garage door opener at a time.
This is useful if you have a two-car garage with separate garage door openers. You might assign the left one to the button on the left and the right opener to the button on the right.
If you’ve followed the steps outline above to reset (erase) your LiftMaster remote, you can pick any of the three buttons. It doesn’t matter other than your personal preference.