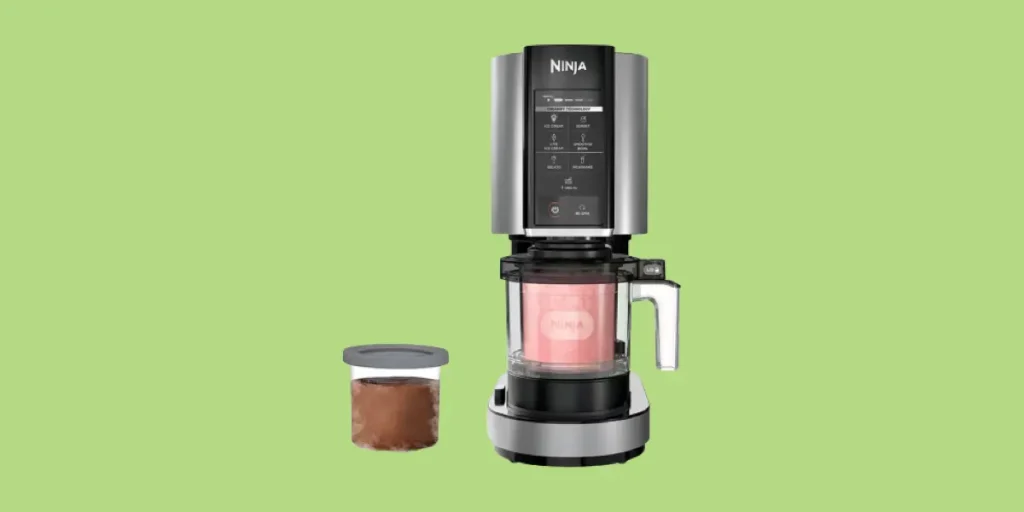
Ninja released their signature ice cream maker, the Creami, about a year and a half ago. And thanks to a surge in popularity last year, we’ve learned a lot about its reliability over that time.
While the news is generally good for the Creami owners out there, there are a few common problems that tend to affect this device:
- Install light blinking
- Paddle/blade getting stuck
- Plastic shavings in your ice cream
This article will cover these common issues and give you the exact steps you need to troubleshoot them.
How The Creami Works
All three of these problems occur because of the way that the Ninja Creami works to churn out those delicious frozen concoctions.
Unlike ice cream makers that have a compressor on board to quickly chill ingredients, the Creami requires you to pre-freeze your ingredients and then add them.
That means that the paddle and motor needs to be powerful enough to mix fully-frozen ingredients.
This requires a lot more force than if the ingredients were liquid (or even just slightly chilled).
All of the issues above are essentially unfortunate consequences of the Creami needing to apply so much force to the blades.
In particular, it’s important to make sure the paddle and lid are both secure before putting the outer bowl into the machine.
Otherwise, you might notice that the install light keeps blinking and the machine won’t run. This same issue can happen with Ninja blenders that aren’t properly seated as well.
Ninja Creami Install Light Blinking
If the install light on your Ninja Creami continues to blink after putting the bowl on, it means that the blade, lid, or container aren’t aligned properly on the machine.
The Creami has sensors to detect when the bowl hasn’t been properly installed in order to prevent damage. The solution is usually to remove the bowl, take the parts off, and put them back together.
Here are the steps to troubleshoot a blinking install light:
- Remove the outer bowl from the machine.
- Open the lid and take out the pint container.
- Remove the paddle from the lid.
- Install the paddle back into the lid, making sure it’s secure.
- Put the lid on the pint container and rotate until you hear a click.
- Place the outer bowl on the base of the unit and twist it towards the right until you hear a click.
- Press the power button to turn the Creami on and check the install light.
If the install light is still blinking after reassembling the bowl and lid, there is likely an issue with the unit. You can try a different lid or outer bowl if you have a spare handy or are willing to order one.
Here are some quick links to Ninja’s official replacement parts for the Creami:
Your other option is to contact Ninja support if you are within the 1-year warranty window. You will need to call Ninja at 866-826-6941 to initiate the claim.
Ninja Creami Stuck
It’s possible for your paddle to get stuck if the mixture you’re using is particularly thick or if something becomes stuck in the blade.
Here are the steps to get your paddle unstuck:
- Turn off the Creami and remove the outer bowl from the machine.
- Remove the lid and visually inspect the paddle.
- Carefully remove the paddle and rinse both it and the lid under warm water.
- Fully dry the lid and paddle with a towel and then install the paddle back into the lid.
- Put the lid on the outer bowl and insert it into the machine.
- Twist it to the right until you hear a click and turn the machine back on.
This process does two things: It helps to remove any debris that’s become stuck in your paddle, and it gives your mixture a minute or two to warm up.
Hopefully, this works to get your Creami back up and running so that you can enjoy the results!
Of course, there’s another common issue that’s related to the paddle as well.
Ninja Creami Plastic Shards
If you notice plastic shards in your ice cream or around the paddle, it likely means that there is an issue with the paddle or the lid.
First, if you haven’t already, follow the steps listed in the previous section to disassemble and clean the lid and paddle.
If you do that and still see plastic shavings after running the Creami, it may be a good idea to replace the lid and paddle.
Like I mentioned earlier, you can contact Ninja support if you are still within the 1-year warranty period and they should be willing to ship you replacements. (Heads up: You may be required to pay for the shipping.)
Otherwise, you can purchase Creami replacement parts directly from their website.
To fix the issue with plastic shards, you might want to order both a lid and a new paddle to be on the safe side.
How To Disassemble Ninja Creami
Since so many of the troubleshooting methods mentioned here involve taking your Ninja Creami apart, here’s a quick video to show you how that process looks:
Quick Recap
The Ninja Creami is a surprisingly reliable ice cream machine, but it’s not without its problems.
Because of the issues with the install light and the paddle, a lot of Creami owners end up ordering a second lid, bowl, and paddle to have on hand.
That way, if something does go wrong with any of the parts, you can quickly swap it out. And you don’t have to miss out on the frozen treat you were about to prepare!
The other piece of good news is that Ninja support is generally very good for the Creami, and they are usually willing to replace parts for free as long as you are in the warranty period. However, they may require you to pay for shipping.
Hopefully this article helped you to get your Creami back into working shape!


