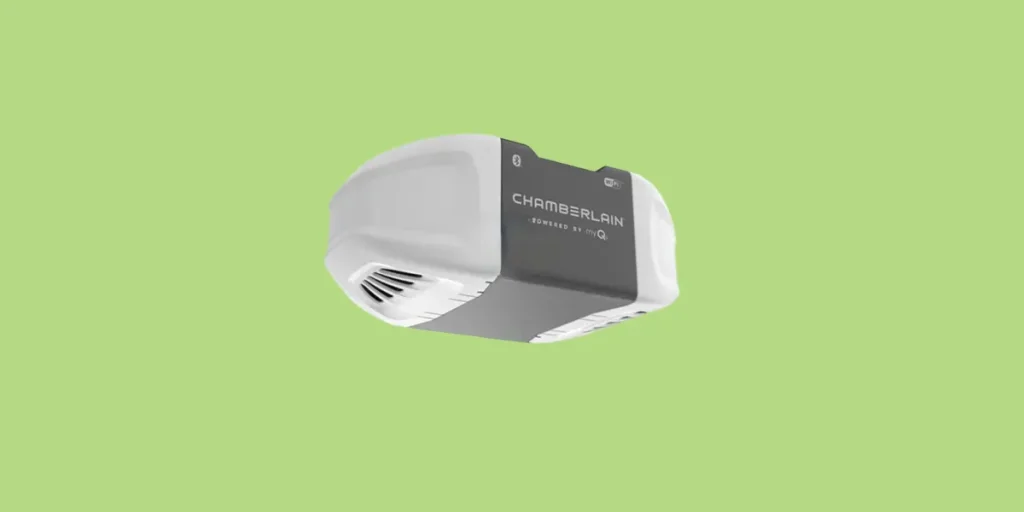
Is your Chamberlain garage door opener acting up? Maybe it’s opening and closing like it has a mind of its own, the light isn’t working, or you’re noticing blinking lights.
Don’t worry, you’re not alone. I’m here to help you troubleshoot these common issues and more, so you can get your garage door opener working like new again.
I’ll cover the ways to troubleshoot all of the most common issues like:
- Garage door not opening or closing
- Fixing a light that’s not working
- Troubleshooting the Wi-Fi connection
- How to reset your Chamberlain opener after a power outage
- How to spot problems with the travel module or logic board
Along the way, I’ll guide you through each step to ensure that you’ve got this.
Let’s get started!
Chamberlain Garage Door Opener Won’t Open Or Close
There is usually a simple reason why your garage door might suddenly stop opening or closing properly. And the good news is that, like with Liftmaster garage door openers, most of these issues can be easily fixed in just a few minutes.
The first step is to figure out what is causing the problem.
If your Chamberlain opener isn’t opening or closing, and you’re seeing the light flash several times, these are the most common reasons:
- There is something obstructing the garage door or the door is binding to the track, stopping it from closing or opening smoothly.
- The safety sensors aren’t properly aligned.
- The door travel needs to be reprogrammed.
- The travel module has failed.
That may sound like a lot, but there’s an easy way to test which issue you’re dealing with. Here are the steps you can take to troubleshoot a Chamberlain door that isn’t working properly:
Step 1: Manually test your door
The first step is to check if there is anything wrong with the door or the track itself. Use the manual disconnect on the Chamberlain opener and open and close the door using the handles.
The door should glide smoothly, and you shouldn’t feel it catch or get stuck at any point. If you do notice the door getting stuck, pause and take a look to see if you can tell what’s stopping it.
Sometimes the solution is as simple as moving a small rock or other debris that’s gotten stuck in the rails. Garages tend to be busy places, after all, so there’s a lot that can happen.
If you spot actual damage to the track or you think the door is binding, your best bet is to schedule a certified technician to come and adjust it. It’s possible to do by yourself, but it’s much safer to let a professional handle it for you.
Of course, if you’re able to manually open and close the door, and nothing seems to be damaged or blocked, it’s time to move on to the next step.
Step 2: Check the safety sensors
When properly aligned, the light on your safety sensors should be constantly on. Take a look at the safety sensor on either side of the garage door and make sure that both LEDs are glowing steadily.
One sensor should glow amber and one should glow green.
If either LED is off
If one or both LEDs isn’t on, it means that there is no power getting to the sensor. Make sure that there is power to the garage door opener, and check the sensor wires for shorts.
If the green LED is blinking
A blinking green LED means that the sensors are no longer aligned properly. This can happen sometimes if someone grazes the sensors or they get hit with a trashcan or box.
First, make sure that there is no obstruction in between the two sensors. Then adjust the angle of the sensor with the green LED until it turns solid. It can also sometimes help to switch the sensors so that the receiving sensor is on the opposite side.
Step 3: Reprogram the garage door travel
If you’ve made it this far, then you’ve already eliminated most of the issues. All that you have left to do is determine if the door travel needs to be reprogrammed or if there is a failure in the travel module.

Follow these steps to reprogram your door travel:
- Make sure that your garage door opener is connected to Wi-Fi before you begin.
- On the wall remote, press and hold the Adjustment button until the UP button begins to flash or until you hear a beep. This will temporarily disable the Safety Reversing Sensors.
- Press and hold the UP button until the door is in the desired up position.
- Press and release the Adjustment button to confirm the up position. The garage door opener lights will flash twice and then the DOWN button should begin to flash.
- Press and hold the DOWN button until the door is in the correct down position.
- Press and release the Adjustment button to confirm the down position.
- If the garage door opener lights flash 5 times, it means that the programming has timed out and you will need to start over.
- If the garage door opener lights flash 2 times, it means that programming was successful.
- Test the Safety Reversal System by placing a 1-1/2″ object (like a block of wood or a book) under the garage door, then close the door. It should immediately reverse as soon as it encounters the object.
After you finish programming the down position, your garage door will automatically reconnect the Safety Reversing Sensors and then open and close the garage door. This helps the system correctly set up the correct force needed to open and close your garage door.
After following all three steps, your garage door should be working properly again. If it still won’t open or close, it may be due to problem with the travel module, which will need a technician to diagnose.
You can contact Chamberlain support to schedule a service appointment.
Chamberlain garage door opener light flashes 5 times
If your Chamberlain opener light flashes five times, it means that the travel adjustment has timed out and needs to be started over again. You will need to start programming the travel again by pressing the Adjustment button and holding it until the UP button flashes.
Troubleshooting a blinking light
A blinking light on a Chamberlain garage door opener can mean several things depending on where it’s located and what color the light is. Here’s a table with all blinking light reasons:
| Location | Blinking LED Color | Reason |
|---|---|---|
| Garage door opener | Blue | The garage door opener is currently in Wi-Fi learn mode and is waiting to connect. |
| Garage door opener | Blue and Green | The garage door opener is connecting to the router. |
| Garage door opener | Green | The garage door opener is connecting to the internet server. |
| Receiving sensor | Green | The sensors aren’t properly aligned and need to be adjusted. |
How to reset all remote controls and keyless entries
Sometimes it can be helpful to reset your remote controls. This can help if your neighbor’s remote is opening your garage door, if you’ve recently lost a remote, or if you recently moved in.
To erase all remotes and keyless entries, follow these steps:
- Locate the round Learn button on your Chamberlain garage door opener
- Press and hold the Learn button for about 6 seconds, or until the LED light goes out.
- If you also want to erase myQ enabled accessories, immediately press and hold the Learn button again and wait another 6 seconds until the LED light turns off.
This will immediately erase all remotes and keyless entries. You can now reprogram your remotes.
How to reset the Wi-Fi network on a Chamberlain garage door opener
Sometimes you can run into issues with your garage door if the Wi-Fi settings have been changed recently or if the opener has lost its connection. Erasing and resetting the Wi-Fi network can help in these cases.
Here’s how to do that:
- Locate the Adjustment button on the Chamberlain garage door opener. It’s the small rectangular button in between the two up and down arrows.
- Press and hold the Adjustment button for about 6 seconds, or until you hear 3 beeps.
- Open the myQ app and follow the prompts to connect your garage door opener to your Wi-Fi network again.
Chamberlain garage door opener light not working
Okay, so you’ve noticed that your Chamberlain garage door opener light isn’t working. It’s not a life or death situation, but it sure can be a hassle, especially when returning home late at night. So, let’s get that fixed, shall we?
First, it’s important to ascertain if the issue lies with the bulb itself or if it’s a more complex problem with the garage door opener. Here’s what you need to do:
- Check the light bulb: I know it seems simple, but sometimes the most obvious solution is the correct one. Unscrew the bulb from the garage door opener and try it in a different socket. If it lights up, it’s not the bulb. If it doesn’t, simply replacing the bulb should fix your problem.
- Inspect the socket: If the bulb is okay, the socket might be the problem. Garages tend to be humid, so look for any visible signs of damage or corrosion. If you find any, you might need to replace the socket.
- Assess the light feature operation: The Chamberlain garage door opener is designed to turn the light on when operation is activated. If the bulb and socket seem fine, but the light is not coming on during operation, it could be an internal issue.
If you’ve tried all the above steps and your light is still not working, don’t panic. It might be time to delve a bit deeper into the problem.
Dealing with Internal Issues
Internal issues might be a little more complex to resolve, but that doesn’t mean it’s impossible. You may need to reset your garage door opener or even replace the logic board.
Here’s how to go about it:
- Unplug your garage door opener from the outlet.
- Wait for 1-2 minutes before plugging it back in.
- Try turning the light on and off to see if that fixed your issue.
This simple reset can often resolve any internal glitches. But if the problem persists, you may need to replace the logic board. Be sure to consult your user manual or contact a professional to assist with this process.
How To Spot Logic Board Problems
Now let’s talk about the logic board, the brain of your Chamberlain Garage Door Opener. If you’re finding that your opener is behaving erratically or not responding at all, it might be a sign of problems with the logic board. Here’s how to spot them:
1. Erratic Operation:
If your garage door opener is operating sporadically – opening and closing without any apparent reason, there’s a high chance it’s the logic board acting up. This erratic behavior is typically caused by faulty circuits within the board.
2. Failure to Respond:
Is your garage door opener ignoring your commands? If you’re pressing the remote or wall control and there’s no response, the logic board might be at fault. Remember, the logic board receives signal from the remote, so if it’s not working, the signal isn’t being received.
3. Unusual Lights:
Take note of your opener’s lights. If you notice the opener’s lights flashing in a pattern or staying on continuously, it could be indicative of an issue with the logic board. These lights are often used as a diagnostic tool and can provide insight into what’s wrong.
4. Inability to Connect with Remote or Keypad:
If you’re having difficulty connecting your remote or keypad to your garage door opener, the logic board might be the issue. These devices rely on the logic board to establish a connection, and if it’s compromised, they won’t be able to connect.
Unfortunately, if the logic board is indeed the issue, it’s not typically something that can be fixed with some DIY magic. It usually requires replacement.
But don’t worry! It’s a manageable task and can often be done relatively quickly by a professional or someone comfortable with home repairs.
What To Do If chamberlain garage door opener not working after power outage
Experiencing a power outage can often lead to some unexpected problems around the house. One of these might be your Chamberlain garage door opener refusing to function after the lights come back on.
Don’t worry, I have a few simple steps you can follow to resolve this issue.
Step 1: Perform a Power Cycle
First and foremost, try toggling the power to the garage door opener. Sometimes, a power outage can cause the system to lock up and a power cycle can often reset it.
Simply unplug the unit, wait for about a minute, and then plug it back in.
Step 2: Check the GFCI Outlets
If the power cycle didn’t solve the problem, you might want to take a look at your GFCI outlets. These are designed to protect against electrical surges, and a power outage can sometimes trip them.
If the outlet your garage door opener is plugged into has been tripped, pressing the reset button should resolve the issue.
Step 3: Reset the Garage Door Opener
Still not working? It’s time to try a full reset. This process varies depending on the model of your Chamberlain garage door opener, but usually involves holding down a specific button on the unit until the LED lights start flashing. Once the reset is complete, you’ll need to reprogram your remotes and possibly adjust the travel distance.
Step 4: Inspect for Damage
If none of the above steps worked, it’s possible that the power outage caused some electrical damage to your garage door opener. Carefully inspect the unit for any signs of damage, such as frayed wires or burnt components. If you find anything suspicious, it’s best to call in a professional to avoid causing further harm.
Remember, if you ever feel unsure about any step in the process, don’t hesitate to contact a professional for help. Safety should always be your top priority when dealing with electrical appliances.
Maintenance Tips for Keeping Your Chamberlain Garage Door Opener in Good Condition
Maintaining your Chamberlain garage door opener is just as important as understanding how to troubleshoot it. Routine maintenance can significantly increase the lifespan of your device, saving you both time and money in the long run.
Plus, it’s easier than you might think! Here’s where to start:
Keep the Tracks Clean
The tracks of your garage door should be kept free from dust and debris. Over time, these can build up and prevent the door from moving smoothly. Use a soft brush or a dry cloth to gently clean the tracks.
Just be careful not to apply too much pressure as you could unintentionally bend or damage the tracks.
Lubricate Moving Parts
Lubricating the garage door’s moving parts is also critical for smooth operation. Apply a high-quality, silicone-based lubricant to the roller, hinges, and tracks at least twice a year. Don’t forget about the opener’s chain or drive screw, either.
Regular lubrication can help extend the lifespan of your garage door opener by reducing friction, which in turn minimizes wear and tear.
Test the Safety Reversal System
For the sake of safety, it’s important to regularly check the operation of your garage door’s reversal system. To do this, open the door and place a roll of paper towels under it. When the door comes into contact with the roll, it should reverse and go back up. If it doesn’t, it’s time to call in a professional.
Check the Door Balance
If your garage door is not properly balanced, it will put additional strain on the opener, which can lead to premature wear. To check the balance, disconnect the opener by pulling the release handle and manually move the door about halfway up. If it doesn’t stay put, this indicates an imbalance that should be corrected by a professional.
Tighten Loose Components
Over time, the vibration caused by the door’s operation can loosen nuts and bolts. That’s why it’s a good idea to periodically check and tighten these components. Remember, a well-maintained garage door opener will operate more efficiently and be less likely to break down.
By following these simple maintenance tips, you’ll ensure that your Chamberlain garage door opener remains in good condition for many years to come. And remember, preventive care is always easier and more cost-effective than repairs or replacements.
What to do when you need professional help
Not every problem can be solved at home, unfortunately. Sometimes you might run into issues that require someone who’s been trained and certified on your Chamberlain garage door opener in order to properly fix.
Fortunately, Chamberlain openers are fairly reliable and come with a strong warranty. Here’s what you get with most Chamberlain models:
| Parts | Motor | Accessories | Belt |
|---|---|---|---|
| 1 year | 6 years | 1 year | 5 years |
So you can see that the belt is warranties for 5 years and the motor for 6 years. As long as you purchased your garage door opener after 2018, your unit should still be under warranty.
To request a service appointment, you will need to find a local dealer and contact them to set everything up. You can also call or live chat with a Chamberlain representative and they can help you find the best technician for your area and specific issue.
When contacting Chamberlain, it will be useful to have the following information on hand:
- Your myQ Serial Number
- Your product serial number
- The date of purchase
You can find the serial numbers on the back of the Chamberlain garage door opener. It’s a good idea to take a photo of this information that way you have it on hand and don’t need to get out a ladder to check it later.