If it’s been a while since you’ve programmed a remote for your LiftMaster garage door opener, or you’ve used a different brand in the past, then not to worry. The process is fairly straightforward and takes just a couple of minutes.
There are two different ways to program your remote that I’ll be covering:
- Programming your remote using the door control
- Programming your remote using the Learn button
Most of the time you will want to use the door control to program a new remote, but there are some situations where you may need to use the Learn button on the garage door opener itself.
I’ll also cover how to reset all of your remote controls if you need to disable access to one. This is good to know in case you ever lose a remote control or one gets stolen.
Let’s get to it!
How To Program A LiftMaster Remote Using The Door Control
This process should take between 1-2 minutes and can be done with just one person. You won’t need any tools or equipment besides the remote you want to program.
Step 1: Flip Up Cover On Door Control
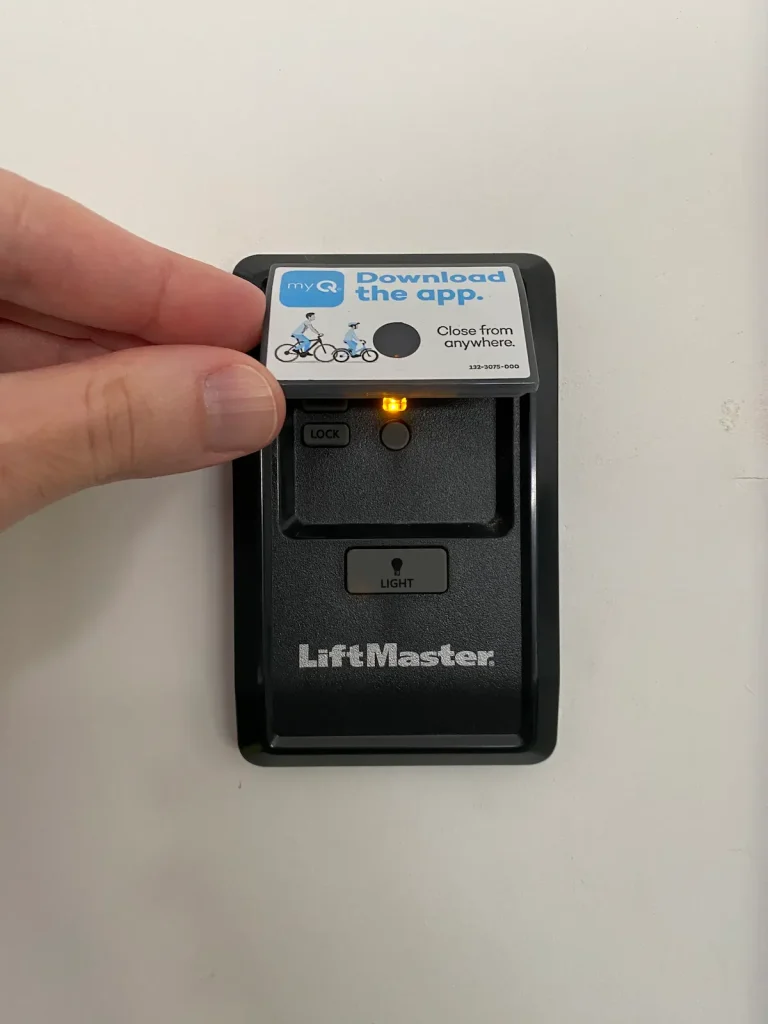
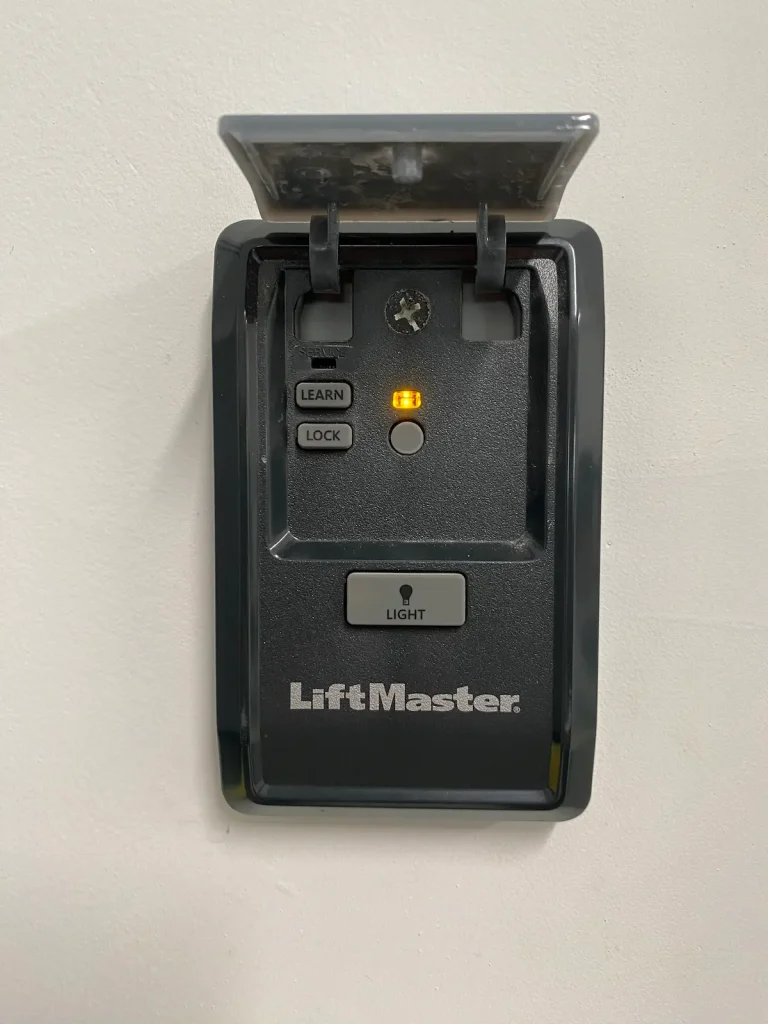
To get started, locate the door control for your garage door opener and flip up the dust cover. This will give you access to the Learn and Lock buttons.
Step 2: Press The Learn Button Twice
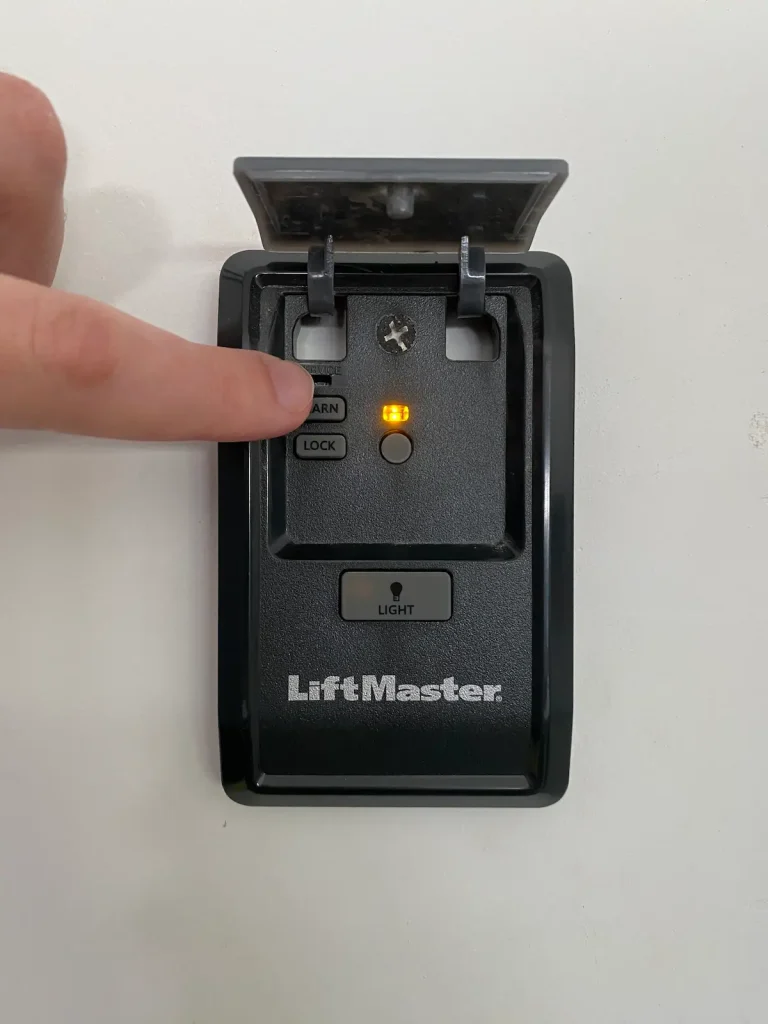
To activate pairing mode on your LiftMaster garage door opener, press the Learn button two times. The LED light on the wall panel should start blinking, and it will continue blinking until you program a remote or it times out.
Step 3: Press The Button On The Remote Control
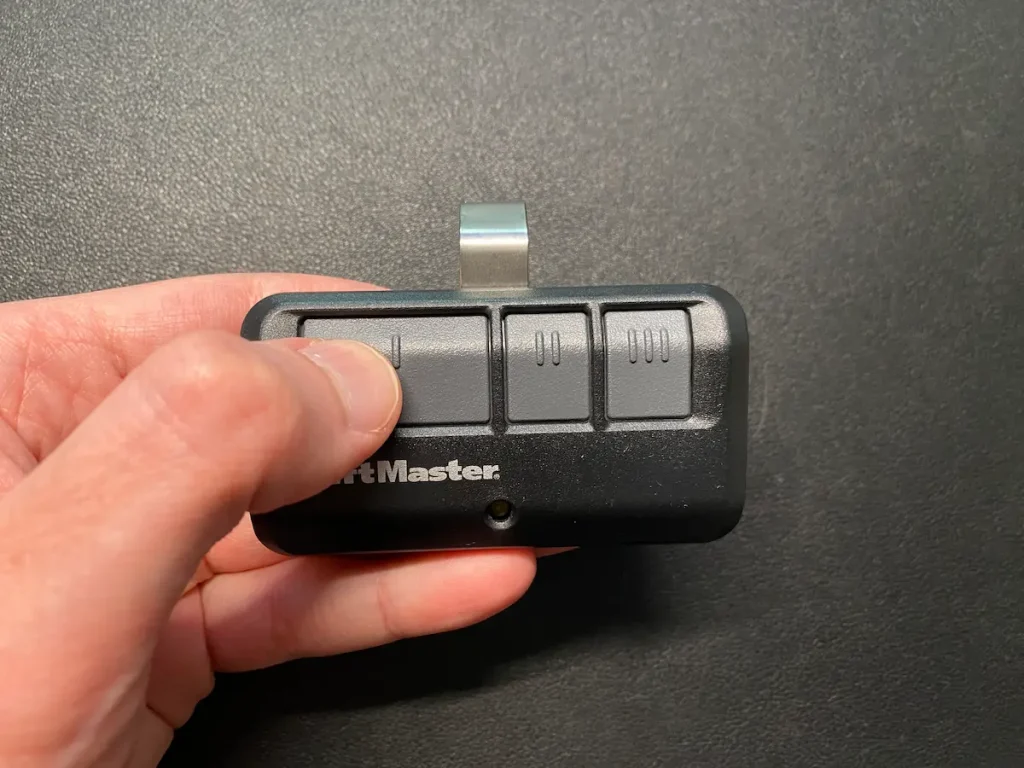
Press and release the button on your remote that you want to control the garage door. If the pairing is successful, you will either see the garage door opener lights flash or you will hear two clicks and the LED light on the wall panel will stop blinking.
Step 4: Test The Remote
Press the same button on the remote that you just programmed to see if it paired successfully. The garage door should open (or close) without any delay after you press the button.
If the LED light isn’t blinking and the garage door doesn’t do anything when you press the button, you may need to program your remote using the Learn button on the motor assembly.
How To Program A LiftMaster Remote Using The Learn Button
Sometimes interference or other issues can get in the way of the programming function from the door control. Programming your remote using the primary Learn button is the best way to fix this issue and to pair your remote.
Step 1: Get A Ladder And Locate The Learn Button
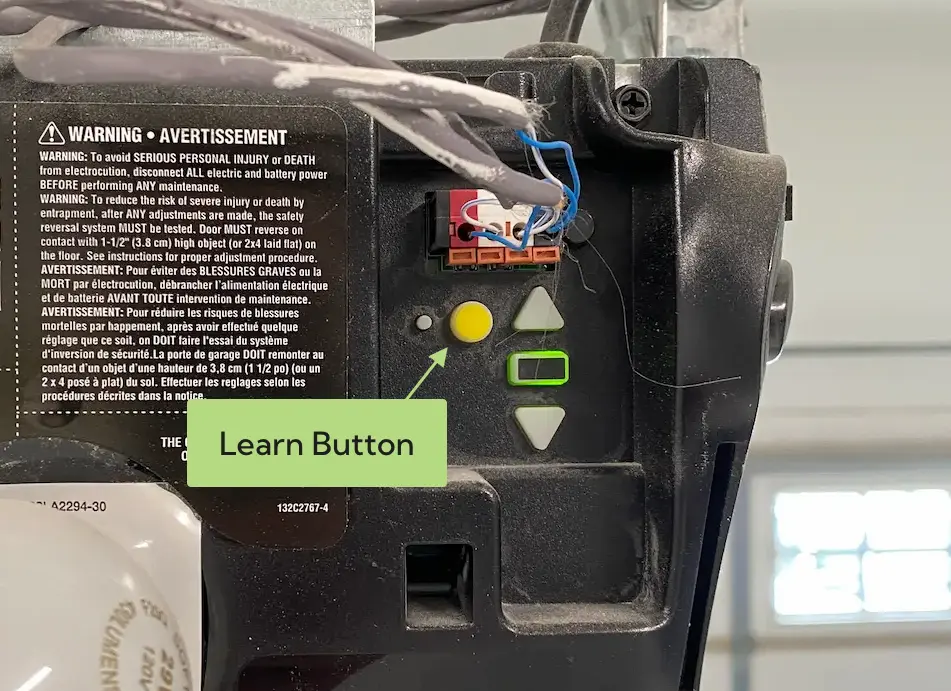
You will need a small step ladder in order to reach the control panel on your LiftMaster garage door opener. The Learn button will be the large, round, yellow button and is usually located right next to the up and down arrows.
Step 2: Press The Learn Button Once
Next, you will want to press and release the yellow Learn button once.
Step 3: Press The Button On The Remote Control

Press the button on your remote control that you want to use for this garage door and hold it down. Continue to hold the button down until the lights on the garage door opener begin to blink or you hear two clicks.
Step 4: Test The Remote
Press the same button on the remote that you just programmed to see if it paired successfully. The garage door should open (or close) without any delay after you press the button.
How To Open LiftMaster Remote
The battery in your LiftMaster remote is designed to last for 1-2 years under normal operation. So if you’re having trouble pairing your remote, the battery may need to be replaced.
Step 1: Remove Visor Clip
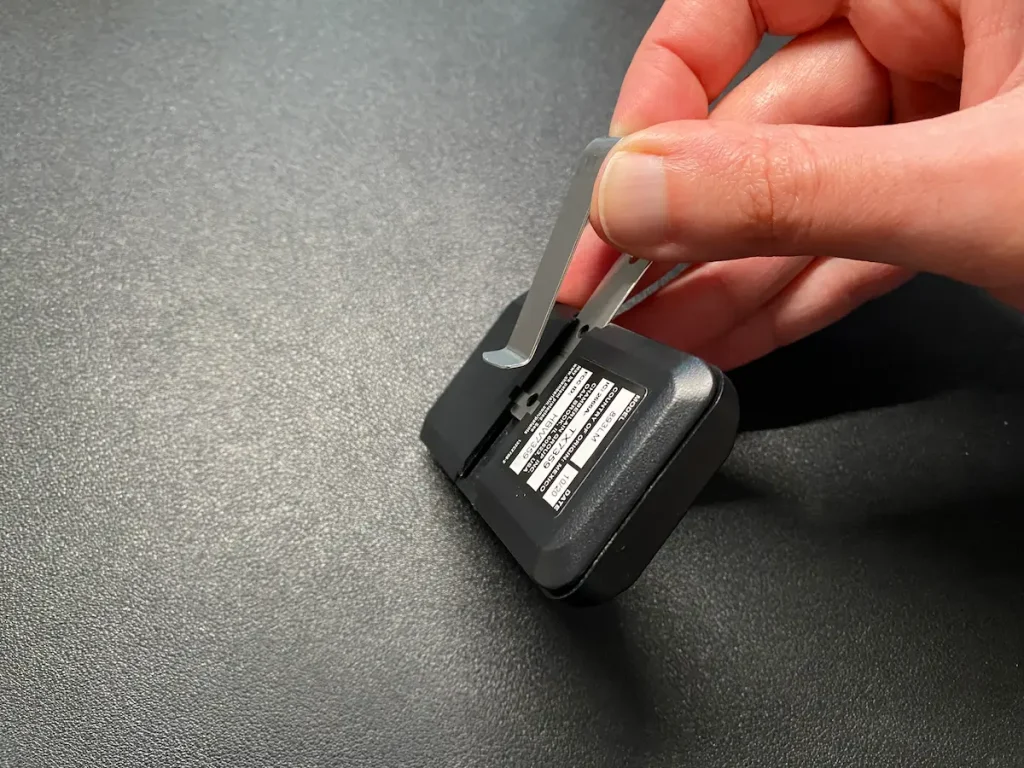
Slide the visor clip out of the remote so that it’s out of the way.
Step 2: Pry Open The Case
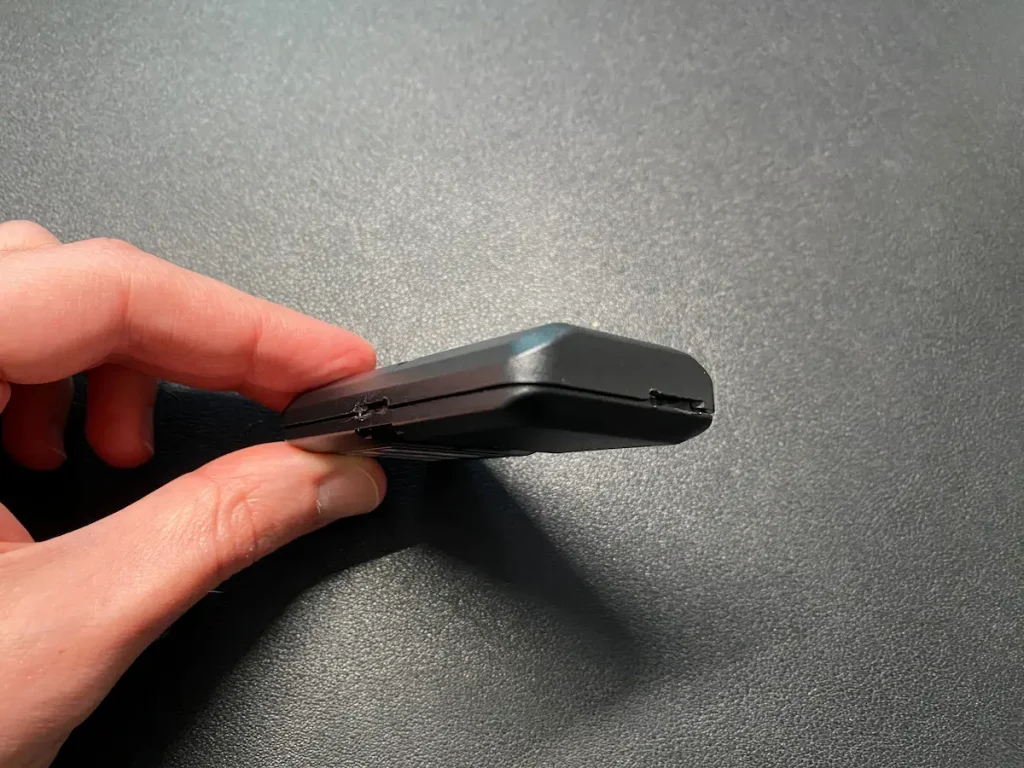
This step can be a little tricky. The case has a notch in the middle directly below the LED light and one on the side.
LiftMaster suggests using the end of the visor clip to pry open the case. However, in my experience it is much easier to open the case using a penny. Insert it all the way into the notch and twist, slowly but firmly, until the case pops open.
Start with the middle notch and then repeat with the notch on the side.
Step 3: Replace The Battery
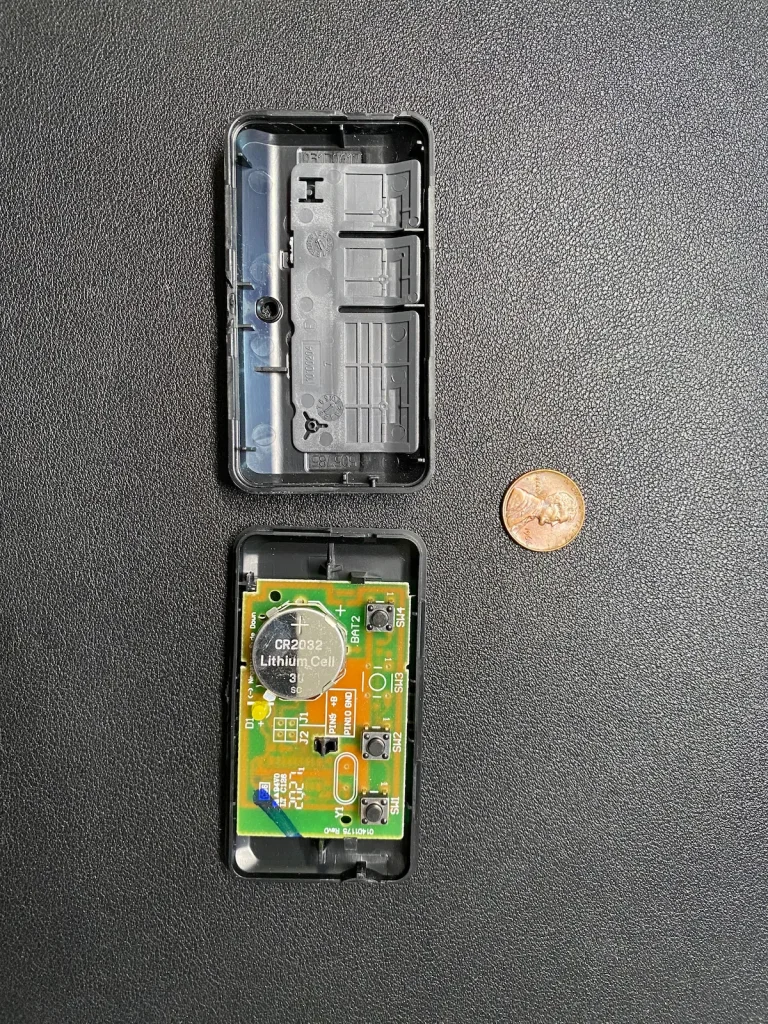
LiftMaster remotes are only compatible with 3v CR2032 coin batteries. Remove the old battery and insert the new one with the positive (+) side facing up.
Step 4: Close The Remote Case
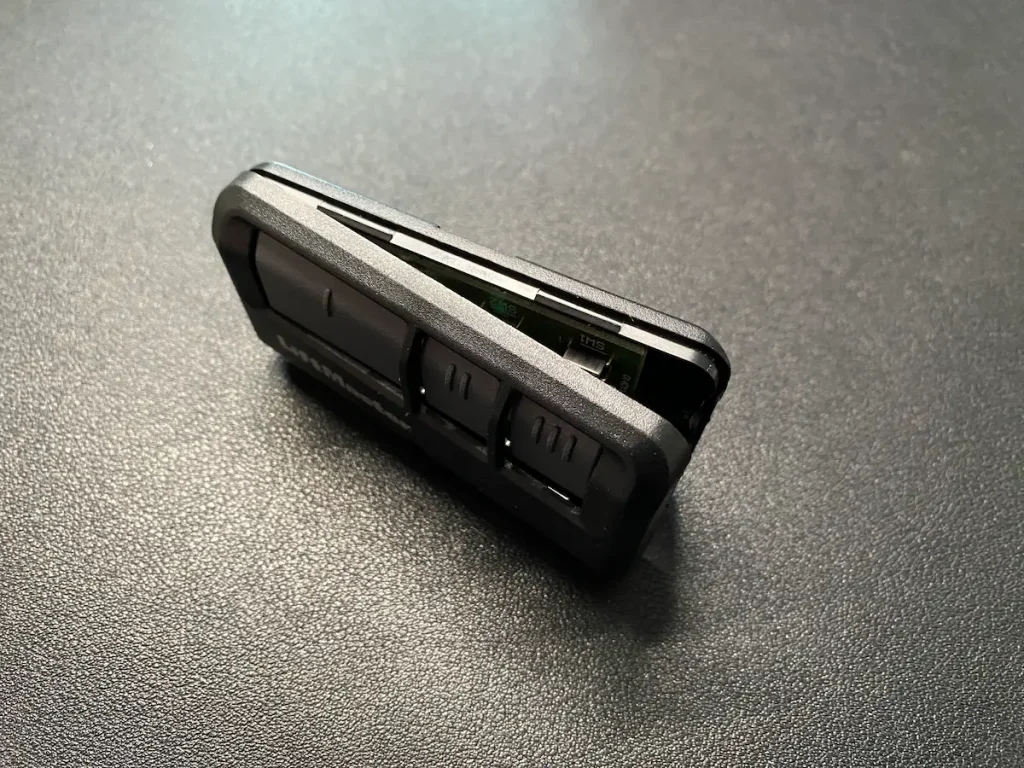
Press the two sides of the remote case together and press firmly all the way around until it clicks into place.
Replace your LiftMaster remote batteries for less than $1 each with this ten pack from Amazon.
How To Reset LiftMaster Garage Door Remote
If you’ve lost a remote or your neighbor’s remote control is opening your garage door, the best option is to erase the memory from your garage door opener and reset all of your remotes.
To reset all of your remotes, press and hold the Learn button on the garage door opener for about 6 seconds or until the LED turns off. This will erase all remote control and keyless entry codes, which can now be reprogrammed.
Troubleshooting
If you run into any issues with programming your LiftMaster remote or have other issues, I’ve written a whole troubleshooting article for LiftMaster garage door openers that might be useful.
You can also follow similar steps to those outlined above to reset or program your LiftMaster keypad.

